Live Sessions
Live sessions are a way to automatically transfer data from a mass spectrometer (through ActiveView2 (AV2)) into iolite pattern by pattern. This allows you to view results and/or images as they are being acquired. This is particularly useful for checking data quality, and for making decisions about how to proceed with the analysis.
Requirements
There are 4 components to the Live Session system:
AV2 with Chronicle configured and running on the laser computer.
Chronicle File Watcher configured and running on the mass spectrometer computer.
The ioLink add-in for AV2 configured and running on the laser computer.
iolite Essentials in Live Session mode running on any computer that is connected to the same network.
How It Works
Chronicle File Watcher detects a new data file being created on the mass spectrometer computer.
Chronicle File Watcher sends the data to AV2/Chronicle.
AV2/Chronicle associates the data with the pattern that has just finished being acquired.
ioLink notifies iolite Essentials that new data are available.
iolite Essentials retrieves the data via ioLink.
iolite Essentials imports the data, updates selections, reprocesses the data, and regenerates images.
Setting Things Up
Chronicle and Chronicle File Watcher
Setting up Chronicle and Chronicle File Watcher is covered in Chapter 20 “Chronicle Data Management” of the ActiveView2 Software Manual (GD100054_J). This should be available on the AV2 computer. If not, please contact Element Scientific Lasers to obtain a copy.
ioLink
The ioLink installer can be downloaded from this link. Running the installer will copy the necessary files to the AV2 add-ins folder, making it available the next time AV2 is started. To start and configure ioLink, you can follow these steps:
Open AV2.
Click on the settings button in the lower left corner of the window.
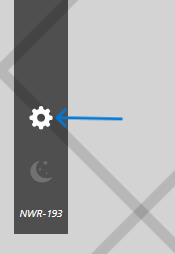
Click the Manage Addin button.

Enable the ioLink add-in by toggling the Activate checkbox.

Optionally toggle the Activate At StartUp option.
Click on the add-ins button on the left side of the window.
Select the ioLink tab.
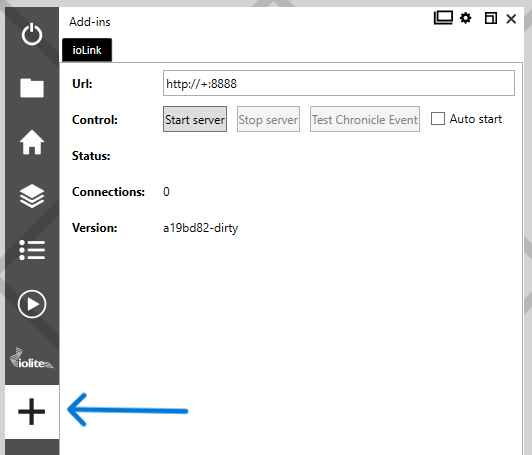
Configure the settings.
Enter the url for the server (default is http://+:8888).
Optionally toggle for the server to start automatically.
If the server isn’t being started automatically, click the Start server button.
If you want to stop the server, click the Stop server button.
Note
If you have any questions about ioLink, please contact iolite@icpms.com and include the version listed in the ioLink user interface.
iolite Essentials
Open iolite Essentials.
Configure the live session settings.
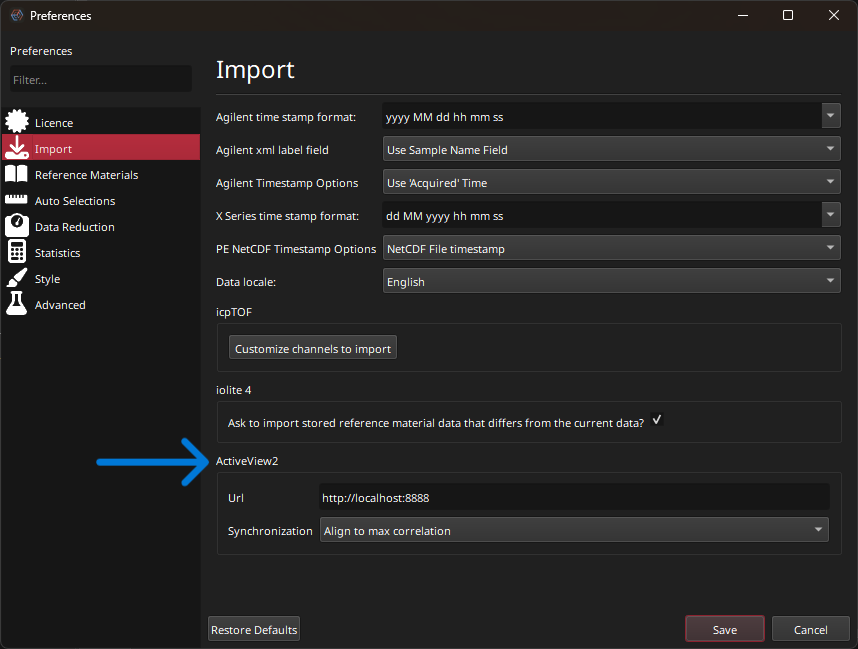
Click on the preferences button on the Welcome Window.
Go to the Import section.
Enter the url to connect to. Note that this is not exactly the same as was configured in ioLink. You will need to include the specific IP address of the AV2 computer. To find this, you can open a command prompt and type ipconfig and look for the IPv4 address.
Adjust the synchronization settings (optional).
Click Save.
Click on the Live Session button on the Welcome Window.
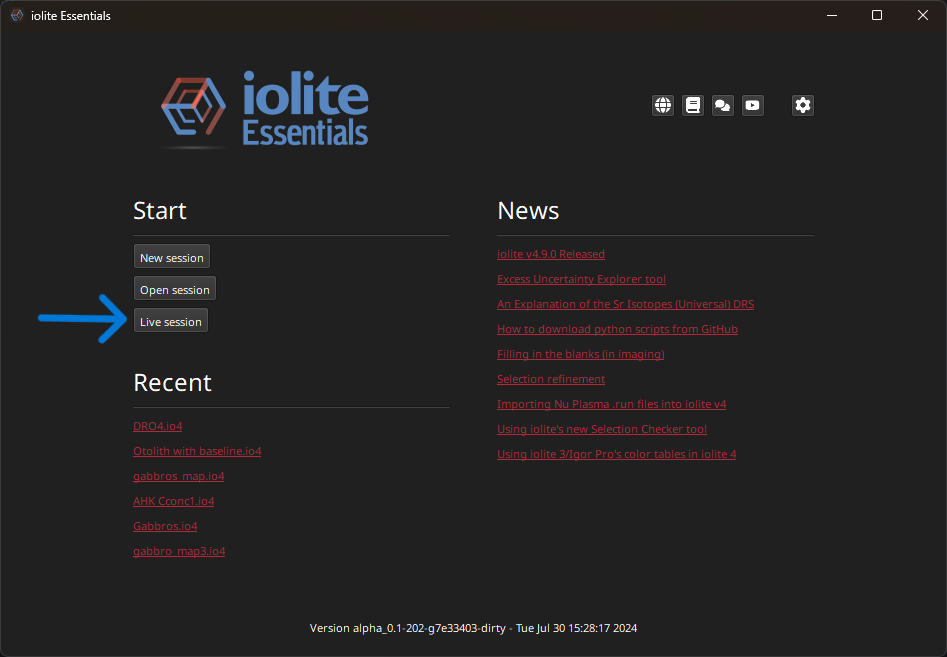
Verify that iolite Essentials was able to connect to ioLink/AV2 by looking at the AV2 icon in the lower left of the window.

Other Considerations
iolite Essentials does not need to be running on the same computer as AV2. It can connect to the laser computer over the network.
If you are having trouble starting the ioLink server you may need to give permission to the account running AV2 to do so. This can be done by running the following command in an elevated command prompt:
netsh http add urlacl url=http://+:8888/ user=DOMAIN\user
Replace DOMAIN\user with the account that is running AV2 (or Everyone) and the port (8888) with whichever port you would like to use.
You can import previously acquired data by going to the AV2 menu in the lower left, clicking “Patterns”, selecting the patterns to import, right-clicking and selecting “Import”.
If you want to start/stop the live session, you can do so by going to the AV2 menu and selecting connect/disconnect as needed.
You can check the status of Chronicle by going to the AV2 menu and selecting “Chronicle”.